How to mount a silicone rubber heater (adhesive, clamps, etc.)?
Mounting a silicone rubber heater properly is key to ensuring its longevity and efficiency. The method you choose will depend on the type of heater, the surface you're mounting it to, and the environmental conditions. Here's a detailed guide on various mounting methods:
1. Adhesive Mounting (Self-Adhesive Heaters)
Many silicone rubber heaters come with an adhesive backing that makes installation quick and easy. If the heater has an adhesive layer, follow these steps:
Step-by-Step Guide:
Clean the Surface: Ensure the surface is clean, dry, and free of debris, oil, or moisture. Use a degreaser or cleaning solution to wipe the surface, and allow it to dry completely.
Peel the Backing: Peel off the protective backing film on the heater's adhesive side.
Apply the Heater: Carefully position the silicone heater onto the surface. Press down firmly to ensure even adhesion. Make sure the heater is aligned and positioned correctly.
Apply Pressure: If the heater is large or flexible, you might want to use a roller or a cloth to apply uniform pressure across the heater to avoid air bubbles and ensure full contact.
Ensure Full Contact: Ensure there is no air trapped under the heater and that it's well bonded to the surface.
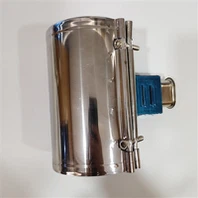
2. Using Clamps or Straps
If the surface is curved (like a pipe or cylindrical tank), or if you don't want to use adhesive, clamps or adjustable straps are a reliable mounting option.
Step-by-Step Guide:
Position the Heater: Wrap the silicone heater around the target surface (e.g., pipe, tank, or drum). Make sure it fits snugly and is positioned correctly.
Clamp the Heater: Use adjustable hose clamps or strap fasteners to secure the heater in place. Place the clamps at the ends of the heater and around the middle if necessary to prevent slipping. Tighten the clamps until the heater is firmly held in place.
Adjust the Fit: Make sure the heater is evenly distributed around the surface, without any twisting or overlap, to ensure even heat distribution.
Check for Gaps: Ensure that there are no gaps between the heater and the surface. The more surface contact the heater has, the more effective it will be.