The Core Concept: Eliminating Waste
In a standard cold runner mold, the sprue bushing is simply a channel that transfers molten plastic from the machine nozzle to the mold cavities. The plastic in this channel cools and solidifies, creating a waste piece (the sprue) that must be separated and recycled.
A heated sprue bushing fundamentally changes this. Its purpose is to keep the plastic in a molten state throughout the entire bushing, from the machine nozzle to the gate of the part. This eliminates the cold sprue, resulting in:
Zero Waste: No sprue to trim, handle, or regrind.
Material Savings: 100% of the injected material goes into the part.
Faster Cycle Times: The mold doesn't have to wait for the sprue to solidify, allowing for quicker ejection.
Improved Pressure Transfer: With no solid sprue to block the flow, injection pressure is more directly transferred to the cavity, which can improve part quality.

How the Heater is Integrated and Works
Here's a step-by-step breakdown of how the heater is used in the sprue bushing system:
1. Heater Types and Integration
Heated sprue bushings typically use one of two types of heaters, integrated directly into the bushing's body:
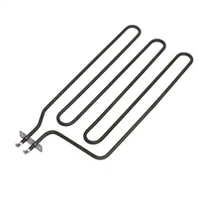
Cartridge Heaters: These are cylindrical heaters pressed into precisely drilled holes surrounding the melt channel inside the bushing. They are very common and effective for this application.
Coil Heaters (or Band Heaters): In some designs, a coiled resistance wire is embedded in a ceramic or metal sheath and wrapped around the outer body of the bushing, often protected by an outer shell.

2. The System in Operation
Step 1: Heating Up: Before the injection cycle begins, the heater is powered on and brings the entire sprue bushing up to a set temperature. This temperature is carefully controlled, typically slightly above the melting point of the specific plastic being used.
Step 2: Melt Channel Formation: The central channel running through the bushing, which is in direct contact with the heater, becomes a permanently molten "melt channel."
Step 3: Injection: When the injection molding machine shoots molten plastic into the bushing, it doesn't start to cool down. It remains hot and fluid as it travels through this heated channel.
Step 4: Delivering to the Gate: The molten plastic is delivered directly to the gate (the entry point into the part cavity). The bushing is designed to have precise temperature control right at this critical gate area to ensure a clean break when the part cools and is ejected.
Step 5: Thermal Isolation: A critical aspect of the design is thermal isolation. The outer surface of the heated sprue bushing is often designed with air gaps or uses less conductive materials (like titanium) where it touches the rest of the cool mold. This prevents heat from "leaking" out and overheating the mold plates, which would cause cycle time issues and part defects.

3. Temperature Control
A thermocouple is inserted into a small hole in the sprue bushing, very close to the melt channel or the gate. This thermocouple continuously reads the temperature and sends feedback to a temperature controller. The controller then adjusts the power to the heater to maintain a perfectly consistent temperature, which is vital for producing consistent, high-quality parts.