1. Understand the Application Requirements
Determine the specific purpose of the heater pad in the aerospace system:
De-icing or Anti-icing: To prevent ice accumulation on wings, propellers, or other critical surfaces.
Thermal Control: To maintain optimal operating temperatures for sensitive equipment like sensors, batteries, or electronic components.
Fuel Line Heating: To ensure that fuels and other fluids remain at appropriate viscosities in extreme temperatures.
Identify the required operating temperature range, wattage, and voltage for the intended application.
2. Select the Appropriate Heater Pad
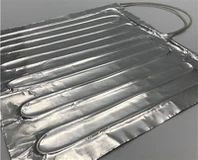
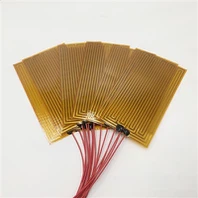
Choose a flexible ceramic heater pad that meets the aerospace-grade requirements, including:
Resistance to high altitudes, vibrations, and extreme temperature variations.
Lightweight and flexible design for easy integration into aerospace components.
Certifications for high reliability and safety, such as compliance with aerospace standards.
3. Prepare the Installation Surface
Ensure the surface where the heater pad will be installed is clean, dry, and free from debris, grease, or oils. Use isopropyl alcohol or a similar cleaner for thorough preparation.
Verify the surface's structural integrity to ensure proper adhesion and heat transfer.

4. Install the Heater Pad
Position the Heater Pad: Align the heater pad on the designated surface. Its flexibility allows it to conform to irregular or curved surfaces like wingtips, sensor housings, or tubing.
Secure the Pad: Attach the pad using aerospace-grade adhesives, high-temperature-resistant tapes, or mechanical fasteners like clamps or brackets.
Thermal Insulation (Optional): For applications requiring minimal heat loss, add a layer of thermal insulation over the heater pad to enhance efficiency and protect surrounding components.
5. Connect the Power Source
Connect the heater pad's wiring to the designated aerospace power supply or control system.
Ensure proper insulation and strain relief for the wires to handle vibrations and movement during flight.
Use connectors and cables rated for high-temperature and high-altitude environments.
6. Integrate Temperature Controls
Incorporate temperature sensors or thermocouples with the heater pad to monitor and regulate heat output.
Use a control system to automate the heating process, ensuring precise temperature control based on real-time environmental data.
7. Conduct Testing
Perform a thorough pre-flight test of the heater pad to ensure it functions correctly and uniformly heats the target area.
Verify that all electrical connections are secure and free from shorts or loose wiring.
Simulate operational conditions (e.g., high altitude, cold temperatures) to confirm reliability.
8. Operational Use
Monitor the heater pad's performance during operation, using integrated sensors and feedback loops to adjust heating as needed.
Ensure the heater pad is activated only when required to conserve energy and prevent overheating.

9. Maintenance and Inspection
Schedule regular maintenance to inspect the heater pad for signs of wear, such as adhesive degradation, wiring damage, or performance inconsistencies.
Replace or repair components as needed to maintain system integrity and safety.
By following these steps, flexible ceramic heater pads can be effectively integrated into aerospace systems, providing reliable thermal management and contributing to the safety and efficiency of aerospace operations.