Understanding the Root Causes of Uneven Heating
First, it's essential to know why it happens:
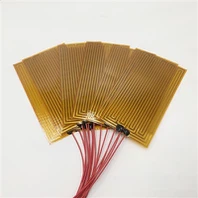
- Poor Resistance Trace Layout: The most common cause. If the spacing between the etched foil or wire elements is inconsistent, areas with tighter spacing will have higher heat density (hot spots), while wider spacing will be cooler.
- Inconsistent Material Thickness: Variations in the silicone rubber encapsulation can cause uneven heat dissipation. Thinner areas may feel hotter on the surface.
- Voltage Drop: Using an incorrect voltage or having inconsistent trace width can lead to a voltage drop across the pad, making one end hotter than the other.
- Poor Quality Materials: Impurities in the resistive element or inconsistent silicone compound can create localized variations in thermal conductivity and electrical resistance.
- Improper Installation/Use: If the pad is not making full, flush contact with the surface it is heating, air gaps will act as insulators, creating cold spots. Bending or folding the pad can damage the internal elements.

Solutions: From Design to Installation
Here's how to tackle the problem at each stage:
1. Design and Engineering Phase (The Most Critical Step)
This is where the problem is most effectively solved before manufacturing even begins.
Optimized Trace Pattern Design:
- Use CFD (Computational Fluid Dynamics) Software: Engineers can use thermal simulation software to model the heat distribution across the pad before creating a physical prototype. This allows them to adjust the trace layout (e.g., adding extra traces in corners, varying spacing) to achieve perfectly uniform heating.
- Consider Power Density: Design for an appropriate watt density (Watts per Square Inch). Higher densities are harder to make uniform and can lead to hot spots. A lower, well-distributed density is often better for uniformity.
- Uniform Trace Width and Spacing: Ensure the resistive element's path is designed with mathematical precision to maintain constant resistance per unit area.
Proper Lead Attachment:
- The points where the electrical leads are attached are critical. The design must ensure a robust and low-resistance connection to prevent localized heating at the terminals themselves.

2. Material and Manufacturing Phase
High-Quality & Consistent Materials:
- Resistive Element: Use high-quality, etched nickel-alloy foil (for maximum uniformity) or precisely wound wire. The material must have a consistent resistance per unit length.
- Silicone Rubber: Use silicone rubber with consistent thermal conductivity and thickness. High-quality silicone ensures even heat spreading away from the traces.
Precision Manufacturing Processes:
- Lamination Control: The process of sandwiching the heating element between layers of silicone must be controlled to avoid wrinkles, bubbles, or areas of delamination, which create insulating air pockets.
- Curing Process: The vulcanization/curing process must be uniform to ensure consistent material properties throughout the entire pad.

3. Integration and Usage Phase
Ensure Full Contact (Crucial!):
- Use of Pressure/Clamping: The heated surface must be in full, intimate contact with the heating pad. Use even pressure across the entire surface (e.g., a clamping mechanism, a tight wrap, or embedding it within a structure).
- Thermal Interface Materials (TIMs): Apply a thin layer of thermal grease or use a thermal pad between the silicone heater and the target surface. This fills microscopic air gaps, drastically improving heat transfer and eliminating cold spots caused by poor contact.
Proper Insulation:
- Insulate the Back Side: If the back of the silicone pad is exposed to air, a significant amount of heat will be lost to the environment, making the surface feel cooler. Adding insulation (e.g., foam, reflective material) on the non-heating side forces the heat to flow efficiently into the target object, improving overall efficiency and perceived uniformity.
Use a Temperature Controller:
- Closed-Loop Control: While not a direct fix for inherent uneven heating, a PID temperature controller with a feedback sensor (thermocouple or RTD) can compensate for some variations.
- The sensor should be attached to a known cold spot (if possible). The controller will then supply power until that cold spot reaches the set temperature, ensuring the entire unit is at least at a minimum temp.
Alternatively, attaching the sensor to a hot spot will prevent thermal runaway and overheating there, improving safety.

JAYE-HEATER will offer all of requirment to you !